Securing IoT applications built on Intel Galileo and Raspberry PI
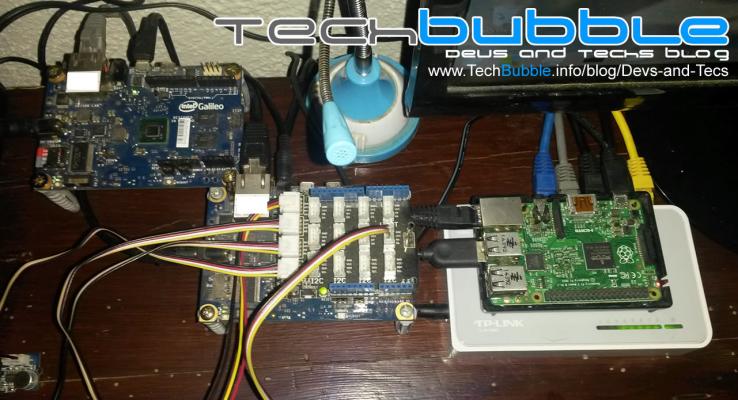
Adam Milton-Barker | Jun 10, 2015 | Devs and Techs | 6692 Keeping up to date with security when developing web applications is a hard enough task, but when you begin to venture out into the world of IoT development it is a whole new ball game. Just like back in the day when I first started developing Facebook applications, stable documentation for building IoT systems is few and far between, and a lot of the information you will find will be incorrect or incomplete. This poses a major threat as beginner IoT developers will be creating insecure systems that jeopardize security and leave gaping holes in systems that could allow access to very private data, and even control over home/business security systems, appliances and devices. For those that follow my articles or know me, you will know that security is my primary concern when developing any type of system, whether it be web, mobile specific, IoT or artificial intelligence. Some people should be smiling now as they remember conversations they have had with me about trying to get me to loosen up on my security methods to make life easier and me point blank refusing with no remorse. If you check any of the websites/applications that I have built you will see that all my systems are secured against the latest known threats and that in fact my encryption methods have an A+ grading which is higher than every one of Google's servers according to the Qualys SSL Report which has capped Google's security at B grade. (https://www.ssllabs.com/ssltest/analyze.html?d=https://www.techbubble.eu) (https://www.ssllabs.com/ssltest/analyze.html?d=https://www.google.com) Having said that, there is not one single system or network that is uncrackable, as I keep saying it won't be possible until we progress further with Quantum Physics and security is an ongoing learning curve, no one should ever gloat that their system is uncrackable as that would be a lie. Although I support people learning about technology, and I am fully aware that it is a necessity that many people will start to realize over the next year or so, it also worries me that micro controllers and products for developing applications on devices such as the Intel Galileo and the Raspberry PI are so easily obtained by, and promoted to people that have little or no experience with development and security. People being given tools like Wordpress that allow people with absolutely no experience to publish systems to the internet has given me a nervous twitch over the last few years, and now I am close to a full blown heart attack as I read about botch jobs of systems that people are creating with no care for or understanding of securing the systems. One way that I have ensured that my systems stay as secure as I can possibly make them is by heavy amounts of research, help from two people that have pretty much mentored me over the last couple of years, and keeping my codes and methods locked down, but due to the massive amount of danger that IoT development can cause I have decided to document some of the fundamentals of the minimal security that should be implemented when developing systems on Intel Galileo and Raspberry PI development boards. SECURING INTERNET ACCESSIBLE SYSTEMS BUILT ON INTEL GALILEO GEN 1: The following information will help you secure your internet accessible Intel Galileo system that is based on a Linux OS. 1. SECURE YOUR ROUTER: This part is an absolute must! Much to my dislike most routers are provided without any of the security features enabled. Securing your router is out of the scope of this article but you can read an article I wrote last year for more info. (https://www.techbubble.info/blog/web/online-security/entry/Is-Your-Router-Secure) 2. CHANGE ROOT PASSWORD: The first stage with any new device should always be to change the default password. List are easily accessible on the internet that give hackers the default passwords of pretty much every type of device and if you do not change your password to a secure password anyone can easily access your device if it is connected to the internet. Once logged into the Intel Galileo via SSH issue the following command from command line: passwd You will then be asked to enter a password of a minimum of 5 characters and informed to use a combination of upper and lower case letters and numbers, you should also use symbols as well to make sure your password is as secure as possible. Re enter your new password and a confirmation will be shown that the password has been changed. 3. REGULARLY UPDATE YOUR FIRMWARE: Another important task to carry out regularly is to update your firmware. On the following link you will find some firmware updater software for your Intel Galileo that can be run from Windows, Mac and Linux, use it regularly to update your boards firmware. (https://downloadcenter.intel.com/download/24748/Intel-Galileo-Firmware-and-Drivers-1-0-4) 4. REGULARLY UPDATE YOUR PACKAGES: It is also important to update and upgrade your packages regularly. From the terminal issue the following commands: opkg update (Updates the list of available packages) opkg upgrade (Upgrades all available packages) 5. ADD A DOMAIN NAME AND SSL CERTIFICATE TO YOUR BOARD: To help ensure that data passed between your Intel Galileo and any connecting web services is encrypted an important thing to do is to add SSL encryption to your requests. Here I will give you the basics of completing this task. - Ensure your local network has a static IP, you will be able to purchase one from your ISP, you can use service such as no-ip.com but this is not the preferred method. - Ensure all ports are closed on your router with the exception of ones that you need for your applications. - Purchase your domain name and install it on a web server, I get mine from NameCheap.com. - Purchase your SSL certificate, I get mine from NameCheap.com. - Edit the domains zone file to include a sub domain that uses an A record to point to the static IP of your network. - Set up your port forward from your router to your Intel Galileo. - Login to your Galileo via SSH and generate an RSA key and a CSR that will be used to activate your SSL certificate. Use the following command to generate your RSA key: openssl genrsa -out ~/YOUR_CERT_FOLDER/YOUR_KEY_FILE.key 2048 Use the following command to generate your CSR: openssl req -new -sha256 -key ~/YOUR_CERT_FOLDER/YOUR_KEY_FILE.key -out ~/YOUR_CERT_FOLDER/YOUR_CSR_FILE.csr You will be asked a few questions at this stage, complete them all but ensure to not enter a password when prompted to, just hit enter. - Head over to where you bought the SSL certificate from and activate your SSL cert using the CSR you generated on your Intel Galileo, once verified you will receive your SSL certificate files. - Connect to your Galileo using SFTP, for this I always WinSCP on Windows but you can use FileZilla or the FTP client of your choice. Once connected upload your SSL cert files to your certs folder and include them in your application to ensure encrypted traffic to and from your Intel Galileo. 6. CLOSE ALL PORTS EXCEPT FOR ONES REQUIRED FOR YOUR APPLICATION: Once you have your application accessible via the internet and secured using SSL it is time to check if IPTables is installed. IPTables allows you to specify which ports are accessible on your Intel Galileo by blocking them all and allowing access to only the ports that you white list. IPTables has a lot of features and methods this is the basics: - Check that IPTables is installed using the following command, if it is, you will see a message saying so, if it is not it will be installed: opkg install iptables - If/once installed you can check your current configs by running the following command: iptables -L or iptables -L -v - Create a new config file for IPTables and modify the code to your liking. This will block all traffic to your Galileo except SSH and the specified ports you white list. To create your new config file you would issue the following command: (I am using nano but you can use your favorite text editor) nano /etc/iptables.firewall.rules and then add the following code and modify to your preference: <----- CODE START ------> *filter # Allow all loopback (lo0) traffic and drop all traffic to 127/8 that doesn't use lo0 -A INPUT -i lo -j ACCEPT -A INPUT -d 127.0.0.0/8 -j REJECT # Accept all established inbound connections -A INPUT -m state --state ESTABLISHED,RELATED -j ACCEPT # Allow all outbound traffic - you can modify this to only allow certain traffic -A OUTPUT -j ACCEPT # Allow HTTP and HTTPS connections from anywhere (the normal ports for websites and SSL). -A INPUT -p tcp --dport 80 -j ACCEPT -A INPUT -p tcp --dport 443 -j ACCEPT -A INPUT -p tcp --dport 8080 -j ACCEPT # Allow SSH connections # # The -dport number should be the same port number you set in sshd_config # -A INPUT -p tcp -m state --state NEW --dport 22 -j ACCEPT # Allow ping -A INPUT -p icmp -j ACCEPT # Log iptables denied calls -A INPUT -m limit --limit 5/min -j LOG --log-prefix "iptables denied: " --log-level 7 # Drop all other inbound - default deny unless explicitly allowed policy -A INPUT -j DROP -A FORWARD -j DROP COMMIT <----- CODE END ------> - Once you have modified and saved your config file you can then load the firewall rules by issuing the command: iptables-restore < /etc/iptables.firewall.rules - To ensure that the firewall is loaded each and everytime you boot up your Intel Galileo you will need to create a new file in the network adapter hooks: nano /etc/network/if-pre-up.d/firewall - make it executable: chmod +x /etc/network/if-pre-up.d/firewall - Enter the following code: <----- CODE START ------> #!/bin/sh /sbin/iptables-restore < /etc/iptables.firewall.rules <----- CODE END ------> - Reboot your Galileo and your firewall should boot up on startup everytime now. These are just the very basics of getting your internet accesible Intel Galileo secure and if you are going to program systems for the IoT you should 100% implement these methods at the very least or risk being struck down by lightning :D The steps for securing a system built on a Raspberry PI are very similar to the above nut include removing the default user and replacing it with another sudo user. The steps to do that are as follows: 1. CREATE SUPER USER: sudo useradd -m USERNAME -G sudo 2. CHANGE SUPER USER PASS: sudo passwd USERNAME 3. CHECK SUDO ON SUPER USER: sudo visudo REMOVE DEFAULT SUPER USER ( pi): sudo deluser pi (remove only user) sudo deluser -remove-home pi (remove user and user home directory) I hope people find this useful, it was certainly a lot of work to figure out how to do all of this so it should save you a lot of time so that you can spend more time focusing on development. As I mentioned this is not a be all and end all guide, there are more security aspects to consider but this should start you on your way.